| Integration Name |
Data Source Name in Report Builder |
Description |
Integration Type |
| Any |
Blumira Metadata |
Blumira-added fields on the event that pertain to when it was parsed, a Blumira-assigned id, as well as the raw (unparsed) log data. |
Varies |
| Blumira Agent |
Blumira Agent Audit Logs |
Events from Blumira Agent recording internal agent information. |
Blumira Agent |
| Blumira Agent Endpoint Logs |
Endpoint logs for systems running Blumira Agent. Will contain data like process events, network events, file events, and more. |
| Blumira Honeypot |
Honeypot (OpenCanary) |
Logs from Blumira's Honeypot module that runs an OpenCanary server to bait hackers with an FTP server that looks insecure, but really just sends activity alerts to the Sensor Logger Module. |
Sensor: Honeypot Module |
|
|
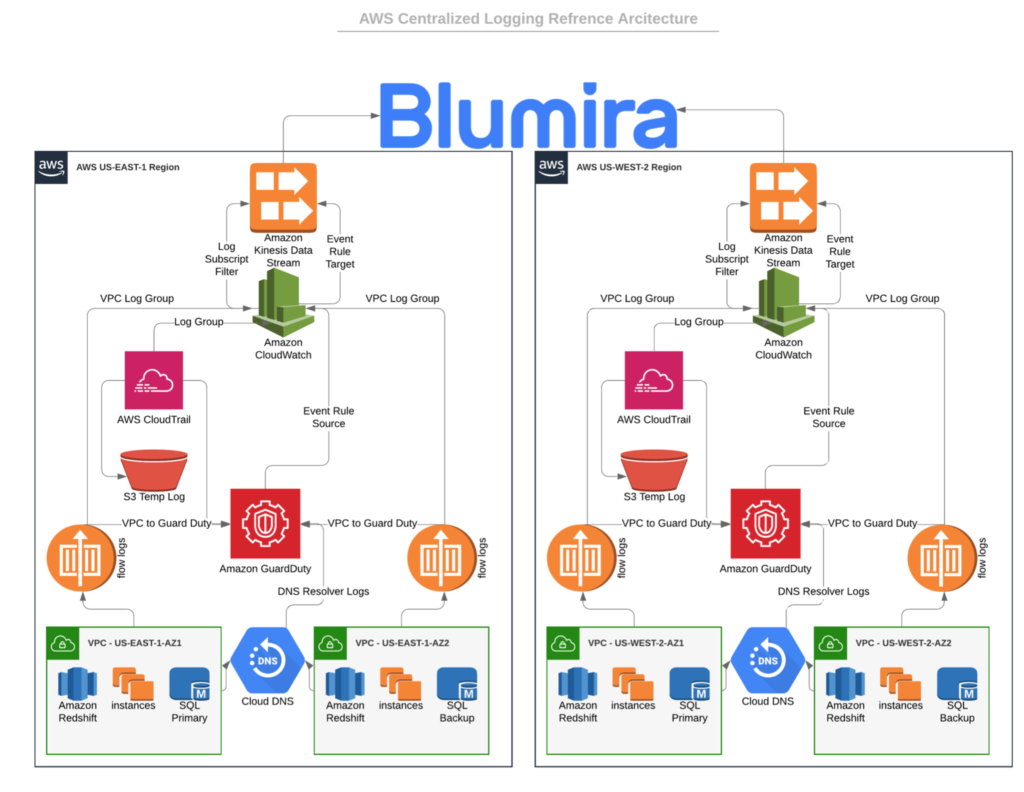
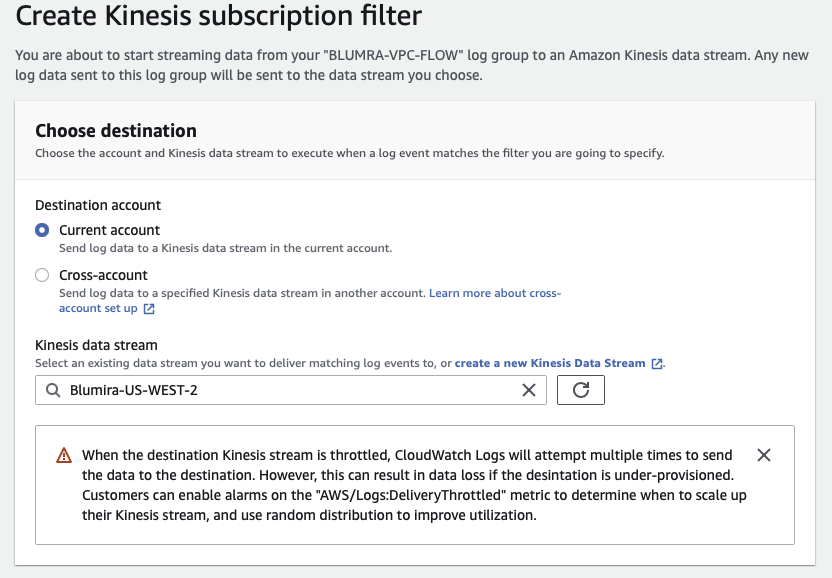
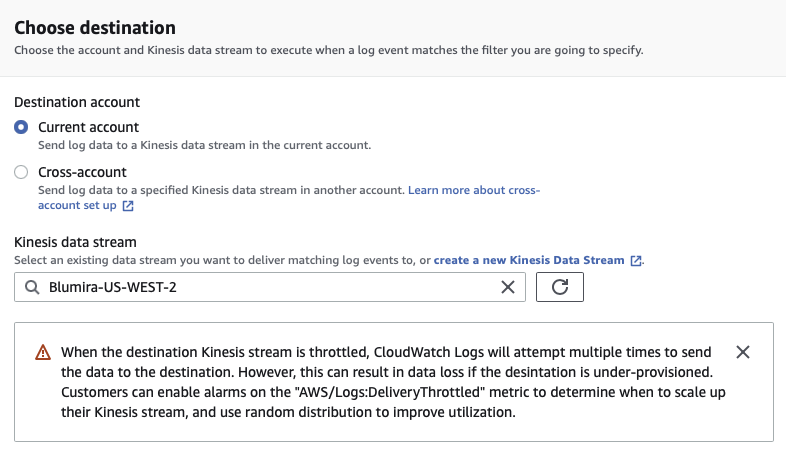
AWS |
Amazon Web Services (AWS) Logs unrelated to specific AWS services such as Cloudtrail or GuardDuty. |
Cloud Connector: AWS Kinesis
|
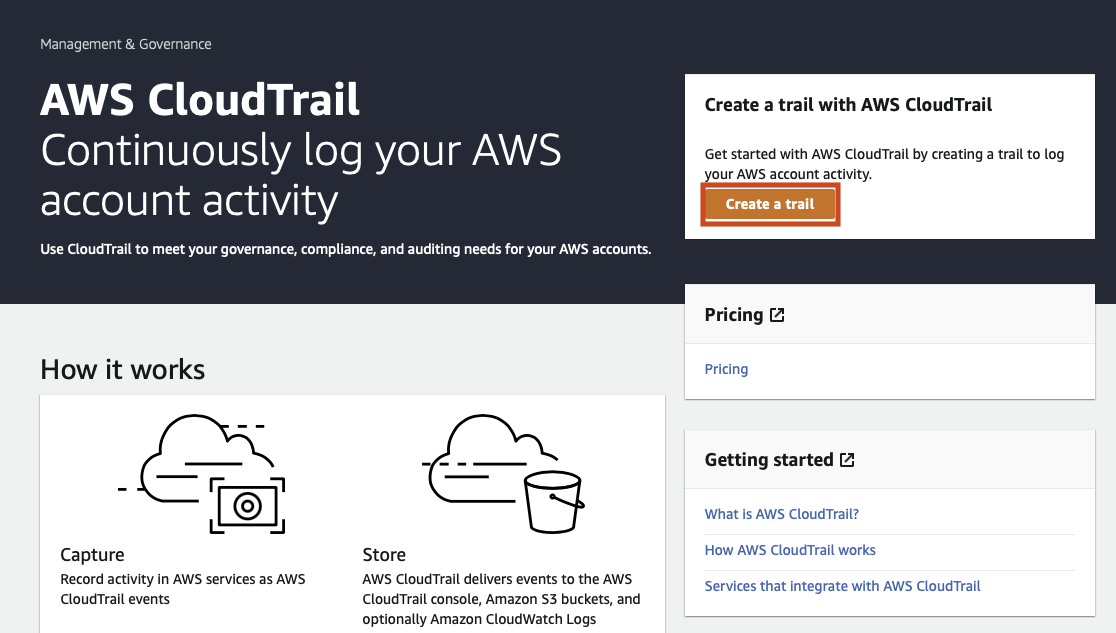
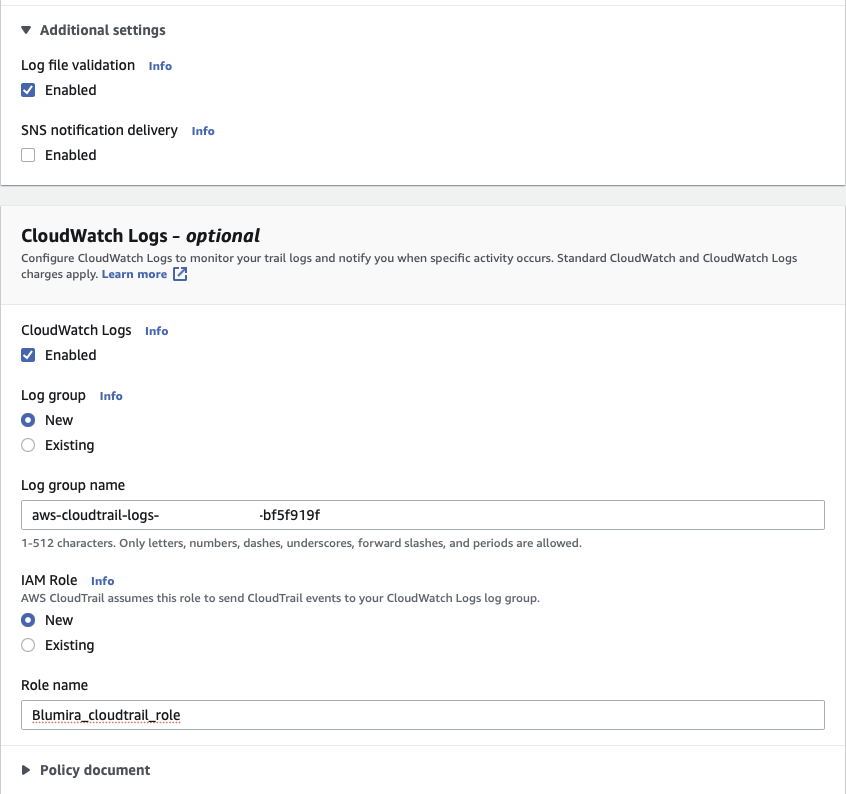
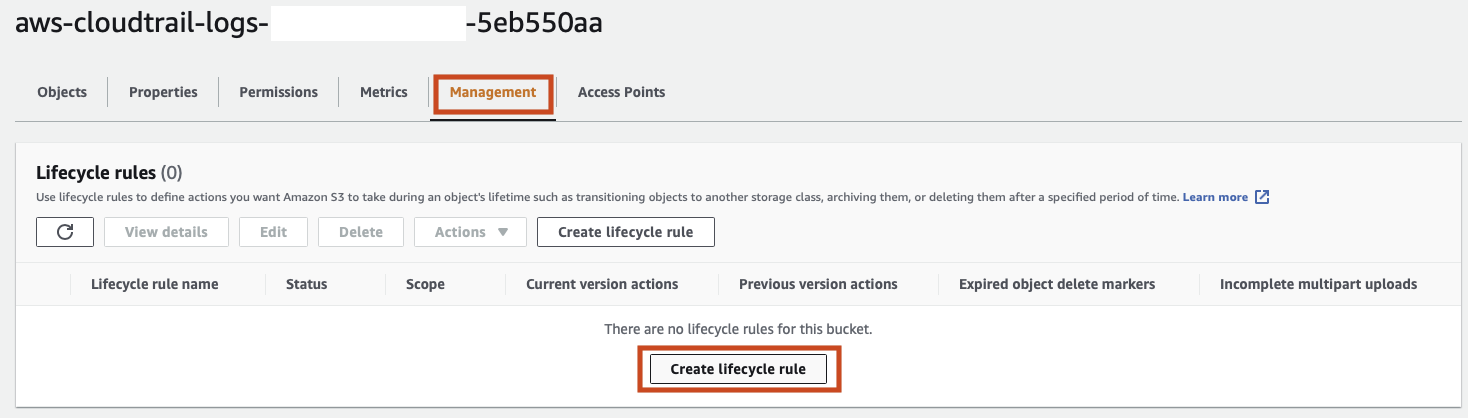
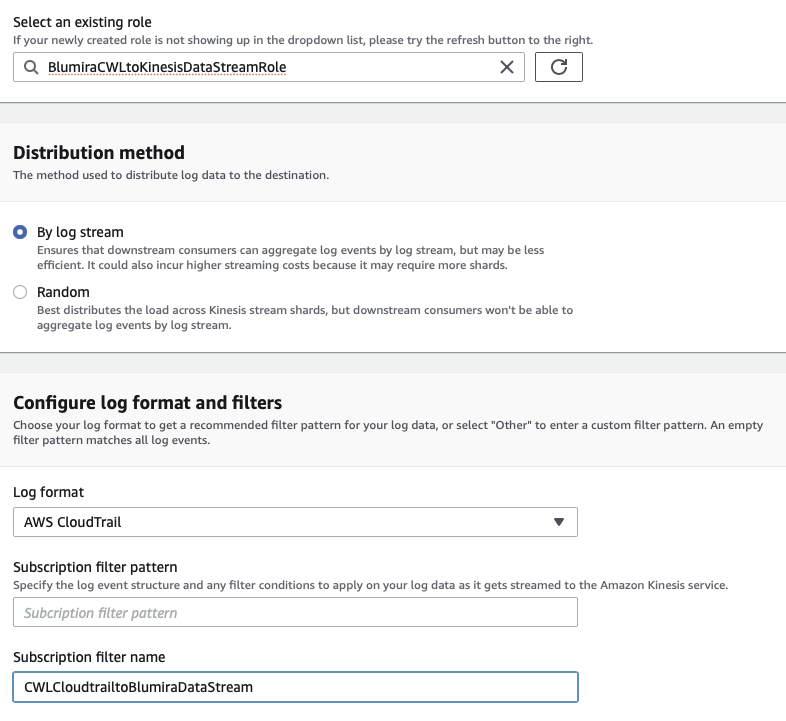
| AWS Cloudtrail |
Amazon Web Services (AWS) Cloudtrail logs for governance, compliance, and visibility into your AWS infrastructure. |
| AWS Cloudwatch |
Amazon Web Services (AWS) Cloudwatch Logs provide visibility into metrics and events across your AWS infrastructure. |
| AWS Guardduty |
Amazon Web Services (AWS) GuardDuty Logs identify potential threat detection events out of your AWS infrastructure. |
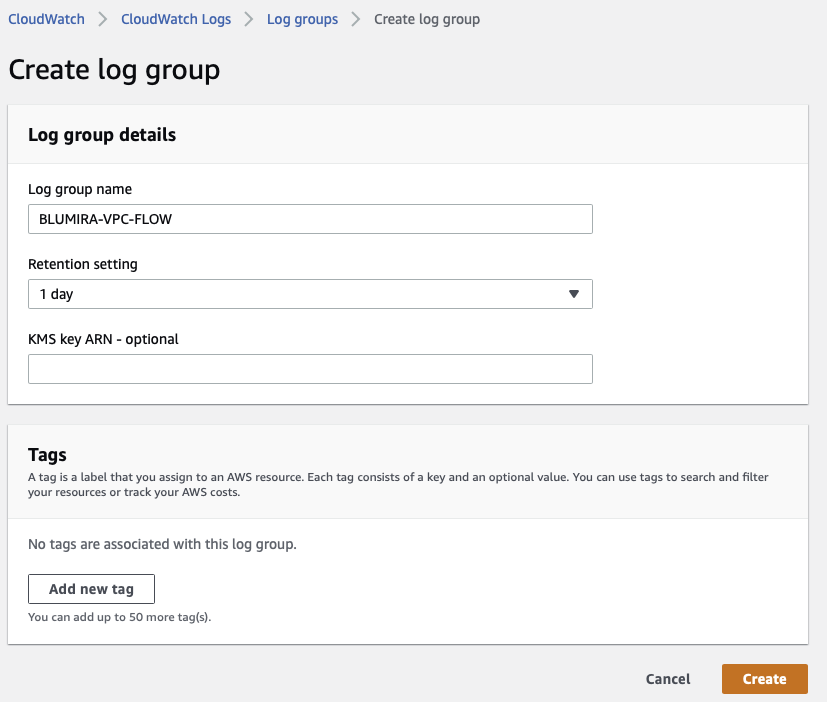
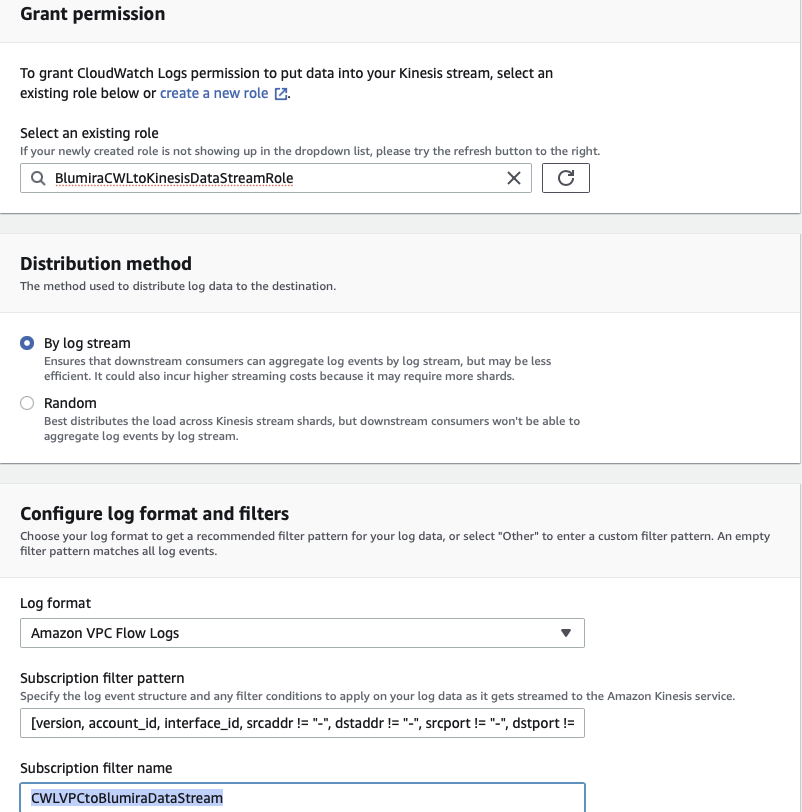
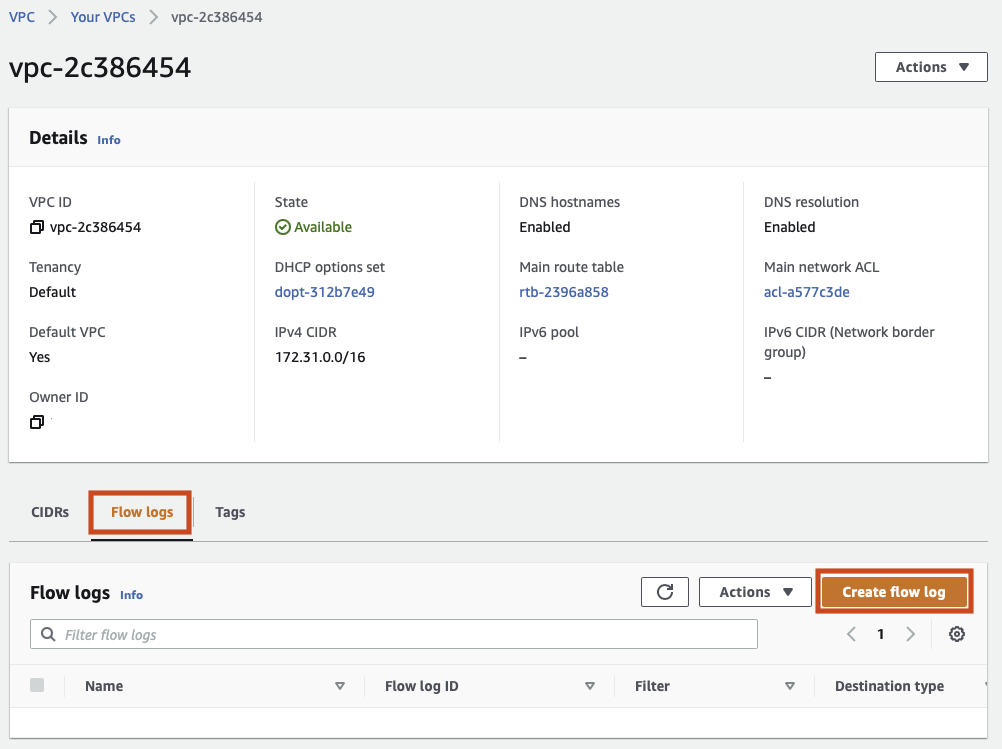
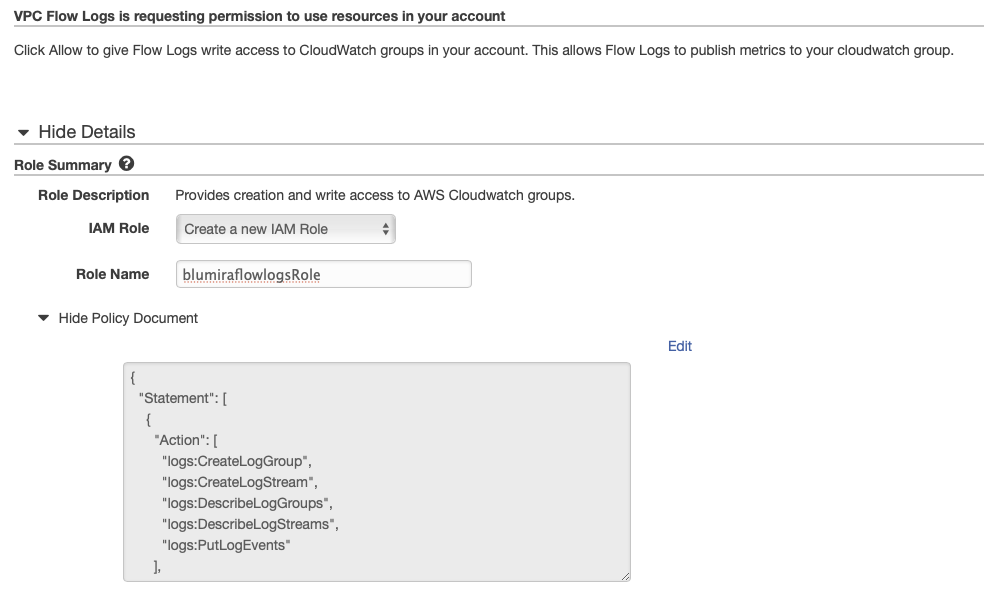
| AWS VPC (Traffic) Flow |
Amazon Web Services (AWS) VPC Traffic Flow Logs provide visibility into the traffic traversing your Virtual Private Cloud networks in AWS. |
|
|
Check Point Audit |
Operational logs related to configuration changes and authentication. |
Sensor: Check Point Sensor Module
|
| Check Point Firewall |
Checkpoint traffic logs. |
|
|
Cisco ASA System |
System diagnostics, error, and informational messages pertaining to operation (control plane) of the Cisco ASA itself, rather than traffic. |
Sensor: Logger Module
|
| Cisco ASA Traffic |
Log messages pertaining to the data plane (including, traffic, blocking, threat, etc. message) generated by the Cisco ASA |
| Cisco Firepower ACL |
Firepower ACL Logging |
| Cisco Firepower IPS (ASA module) |
Events from the Firepower NG-IPS module of a Cisco ASA device. |
|
|
Cisco Firepower Threat Defense (FTD) |
FTD alerts and logs |
Sensor: Logger Module
|
| Cisco FMC |
Cisco Firepower Management Center |
| Cisco NAT |
NAT'd Traffic logs |
|
|
Meraki |
General logs uncategorized by Meraki |
Sensor: Logger Module
|
| Meraki Airmarshal |
Wireless AP logs associated with rogue AP and similar security-based data from Meraki. |
| Meraki System Events |
Meraki System Events, such as operational issues |
| Meraki Flow Connections |
Unique connections being tracked by the Meraki device. |
| Meraki IP Flow Connections |
Unique IP-Based connections being tracked by the Meraki device. |
| Meraki Layer7 Firewall |
Layer7 traffic and network logs associated with your Meraki Firewall. |
| Meraki Security Event |
Events detected by the Meraki IDS/IPS if licensed. |
| Meraki URLs |
Meraki URL connection tracking events |
| Cisco Umbrella |
Cisco Umbrella |
Security event data from the Cisco Umbrella reporting API. |
Cloud Connector: Cisco Umbrella |
|
|
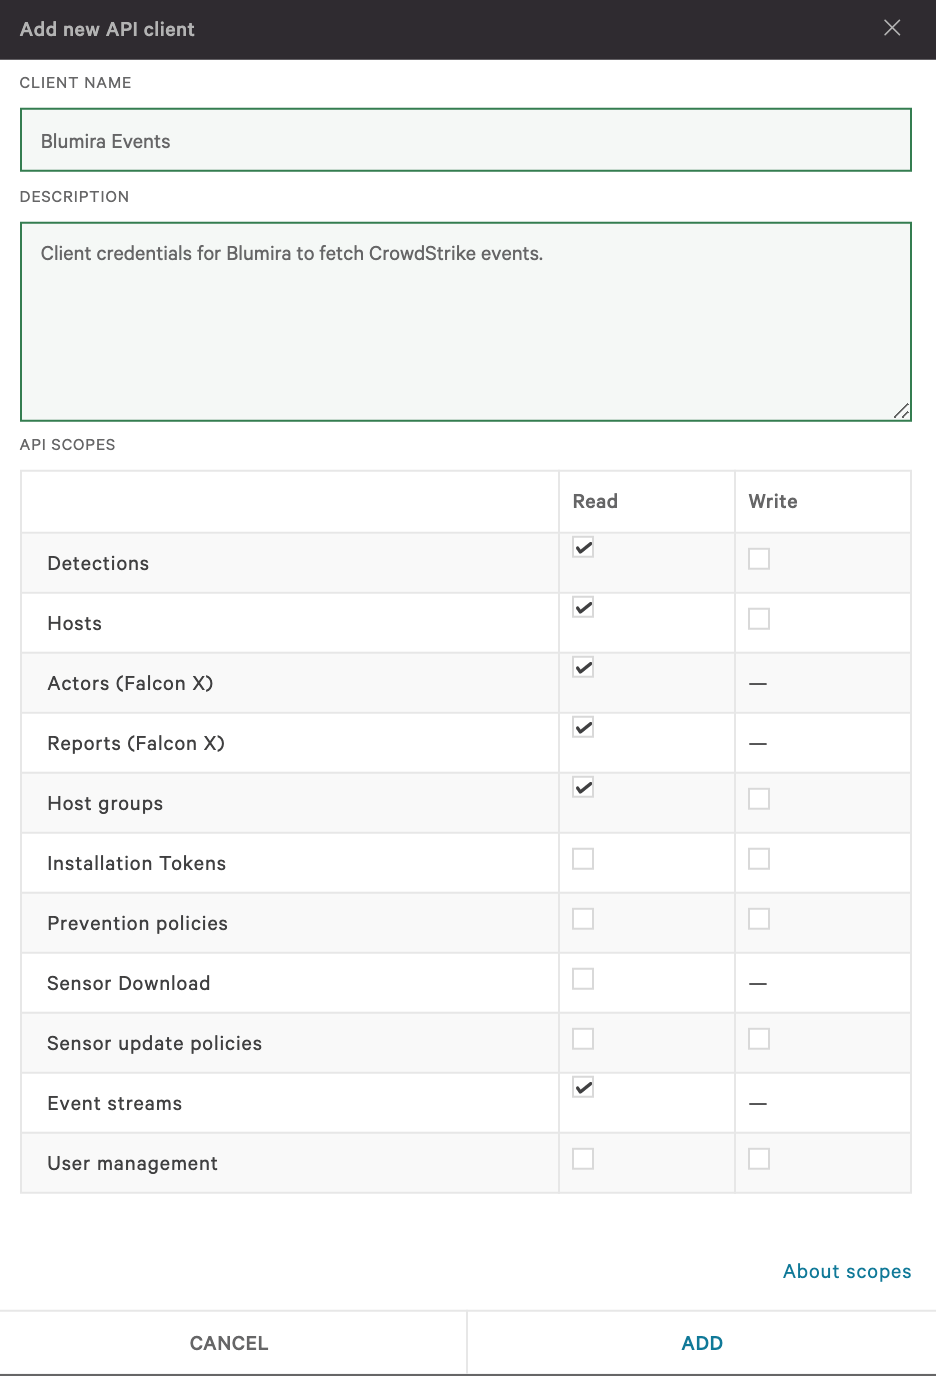
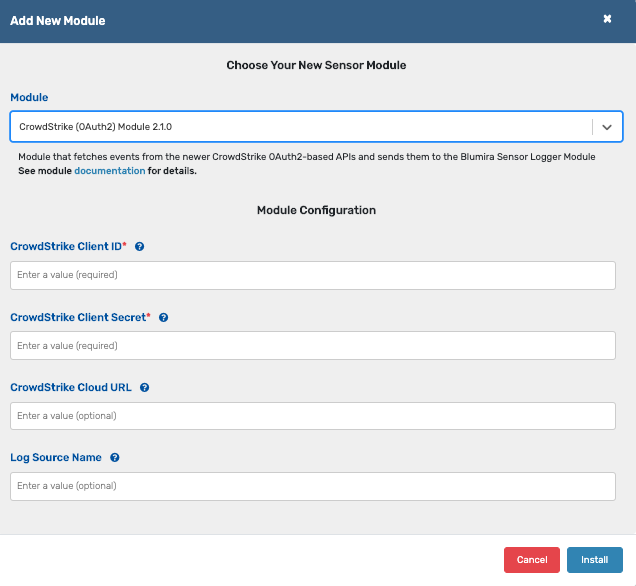
CrowdStrike2 |
CrowdStrike legacy (key-based) API-provided events |
Sensor: CrowdStrike (OAuth2) Module
|
| CrowdStrike V2 |
CrowdStrike Events derived from the newer (OAuth2 Client) API |
|
|
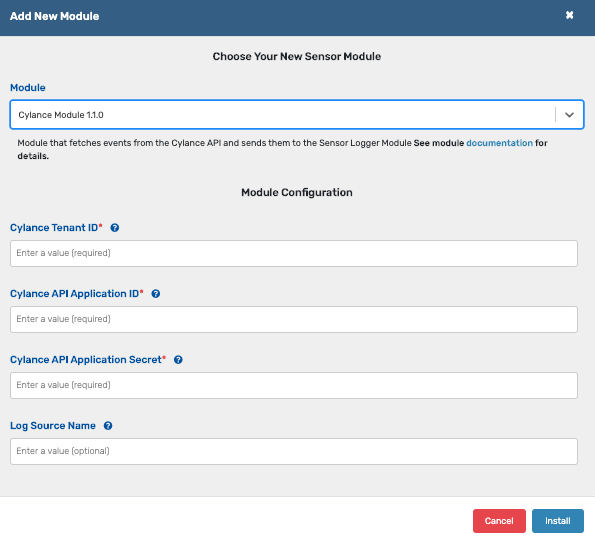
CylanceOPTICS Detections |
|
Sensor: Cylance Module
|
| Cylance Memory Protection |
|
| Cylance Protect |
|
| Cylance Threats |
|
|
|
Duo Security |
Logs for authentications via Cisco’s Duo Security multi-factor authentication products |
Cloud Connector: Duo
|
| Duo Security Admin Logs |
Logs for administrative actions via Cisco’s Duo Security multi-factor authentication products |
| Duo Security Auth Logs |
Logs for authentications via Cisco’s Duo Security multi-factor authentication products |
|
|
Forescout |
Network and device visibility and security with a focus on IoT and Industrial Controls |
Sensor: Logger Module |
| Forescout Command Center |
Logs derived from Forescout's Command Center for network and device visibility and security with a focus on IoT and Industrial Controls |
Sensor: Logger Module |
|
|
FortiAuthenticator |
FortiAuthenticator provides MFA logs for Fortigate's Authentication solution. |
Sensor: Logger Module
|
| Fortigate Anomaly |
IDS logs from Fortigate |
| Fortigate App Control |
Application Policy logs from Fortigate |
| Fortigate DLP |
DLP-related events generated from Fortigate |
| Fortigate DNS |
DNS-related events generated by the Fortigate device. |
| Fortigate EMS Event |
Fortigate Enterprise Management Server Event logs such as AV detections. |
| Fortigate EMS Scanning |
Fortigate Enterprise Management Server Endpoint Scan Event logs such as vulnerabilty scanning. |
| Fortigate EMS Traffic |
Fortigate Enterprise Management Server Endpoint traffic log events. |
| Fortigate System/VPN |
Fortigate VPN logging |
| Fortigate IPS |
Fortigate Intrustion Prevention logs |
| Fortigate SSL |
Fortigate SSL Inspection Logs |
| Fortigate Traffic |
Log messages pertaining to the data plane (including, traffic, blocking, threat, etc. message) generated by the Fortigate firewall. |
| Fortigate Virus |
Fortigate AV logs |
| Fortigate VOIP |
Fortigate VOIP logs |
| Fortinet Fortiguard Webfilter |
Fortigate Webfilter logs |
| Google Workspaces |
Google GSuite |
GSuite activity logs |
Sensor: GSuite Module |
|
|
Infoblox Administration |
Infoblox Administrative logs associated with your Infoblox implementation. |
Sensor: Logger Module |
| DHCP Logs |
DHCP logs derived from a number of sources such as Infoblox. |
| DNS Logs |
DNS logs derived from a number of sources such as Infoblox. |
| KnowBe4 PhishER |
KnowBe4 PhishER |
KnowBe4 spam/malicious email management platform. |
Sensor: Logger Module |
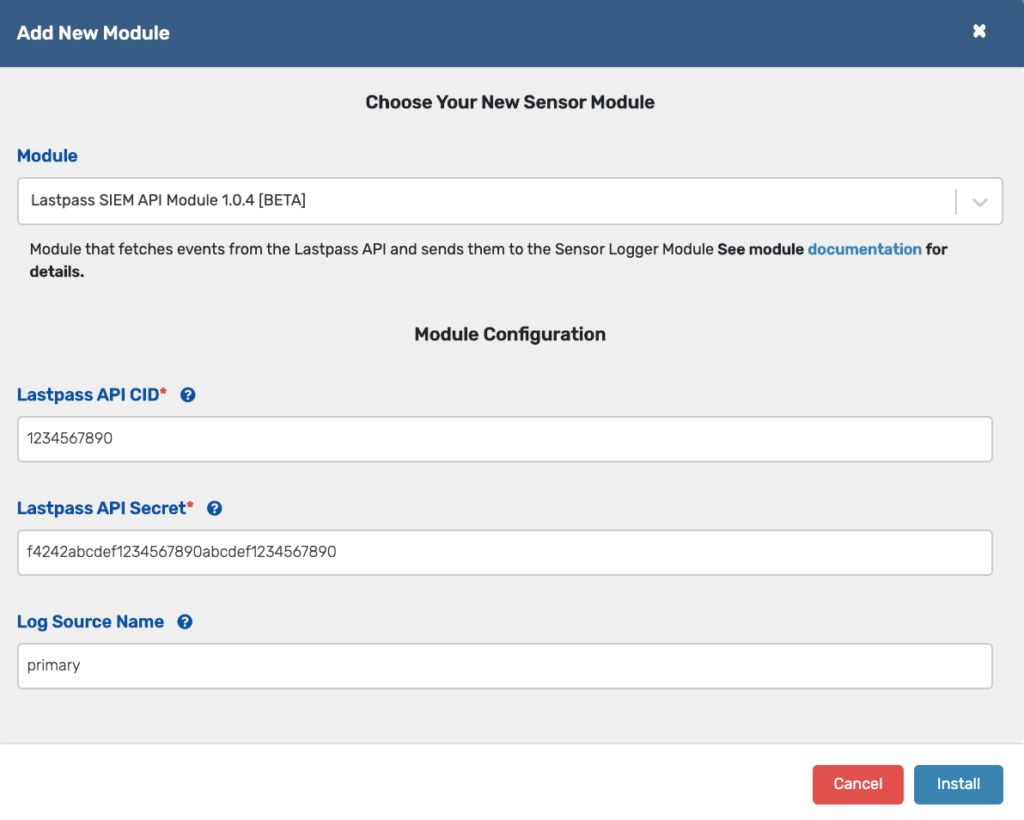
| LastPass |
LastPass |
LastPass activity logs |
Sensor: LastPass SIEM API Module |
| Malwarebytes |
Malwarebytes |
Malwarebytes activity logs |
Sensor: Logger Module |
|
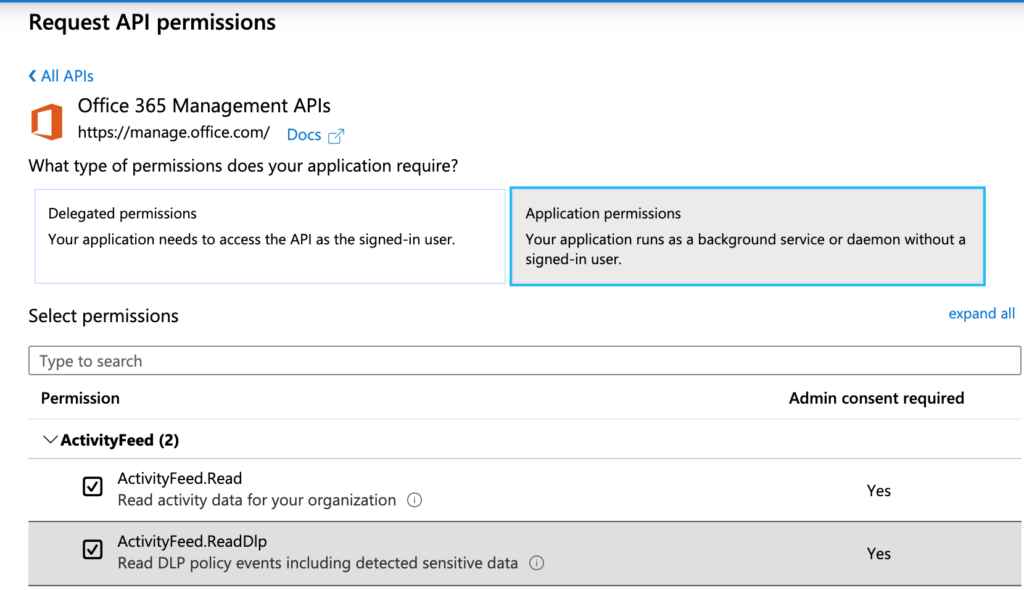
(Office 365)
|
Microsoft365 |
M365 uncategorized generic logs |
Cloud Connector: MS 365
(collects unified audit logs only)
|
| Microsoft365 ATP |
Different from MS Cloud App Security, these are events derived directly from Microsoft 365 APIs. |
| Microsoft365 Azure AD |
M365 logs related to Azure AD services |
| Microsoft365 Compliance |
M365 Compliance logs such as CA or RBAC policies |
| Microsoft365 Data Center |
|
| Microsoft365 Dynamics |
M365 Dynamics activity logs |
| Microsoft365 Exchange |
M365 Exchange event logs |
| Microsoft365 Flow |
|
| Microsoft365 Forms |
|
| Microsoft365 Insights |
|
| Microsoft365 Power BI |
|
| Microsoft365 Project |
|
| Microsoft365 Security |
Events collected via Azure Event Hub for Defender ATP. |
| Microsoft365 Sharepoint |
M365 Sharepoint activity logs |
| Microsoft365 Skype |
M365 Skype activity logs |
| Microsoft365 Video Stream |
|
| Microsoft365 Teams |
Does not include VOIP activity logs |
| Microsoft365 Users |
|
| Microsoft365 Workplace |
|
| Microsoft365 Yammer |
|
|
|
Defender ATP |
M365 Defender Logs |
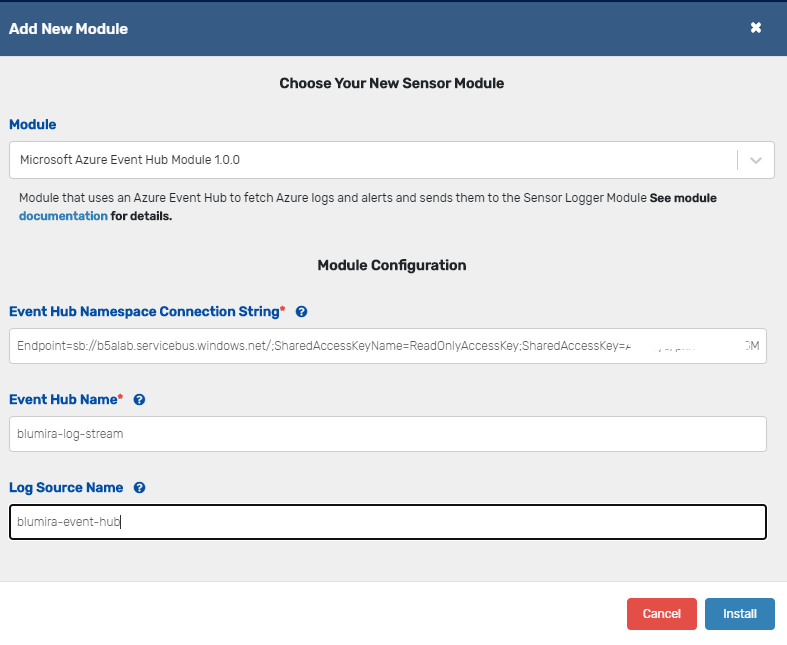
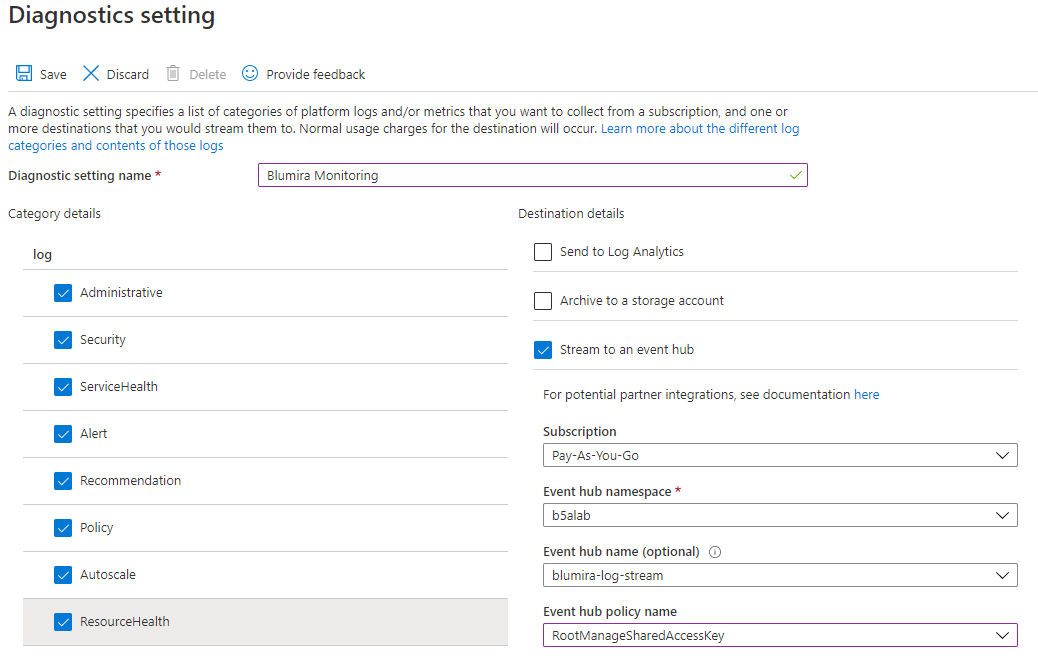
Sensor: Microsoft Azure Event Hub Module
|
|
|
Azure General |
Azure General events and catchall logs. |
Sensor: Microsoft Azure Event Hub Module
|
| Azure Account Management |
Azure Account Management and Activity event logs. |
| Azure Administration |
Azure Administration management and activity logs. |
| Azure AD Audit |
|
| Azure AD Service |
|
| Azure Logon |
Azure Domain Account login event logs. |
| Azure Monitoring |
Azure Monitoring event logs for all defined Azure monitoring. |
| Azure Non-interactive Signin |
|
| Azure Policy |
|
| Azure Policy Change |
|
| Azure Privilege Use |
Azure-derived Privileged events and action logs. |
| Azure Security |
|
| Azure Signin |
|
|
|
Microsoft Cloud App Security |
|
Sensor: MS Cloud App Security Module
|
| Microsoft Cloud App Security General |
|
| Microsoft Cloud App Security Azure AD Logins |
Azure AD Logins that have been identified by MSCloud App Security |
| Microsoft Cloud App Security Azure ATP |
Azure ATP Events Identified by MSCloud App Security |
| Microsoft Cloud App Security Visibility |
MSCloud App Security purchased the company Adallom to help with IT and Visibility Event tracking. |
| Microsoft Cloud App Security Azure |
|
| Microsoft Cloud App Security Microsoft365 |
|
| Microsoft Cloud App Security Microsoft365 Azure AD |
Events derived from MSCloud App Security that have been identified via Azure AD logins that impacted your Microsoft365 environment. |
| Microsoft Cloud App Security Microsoft365 ATP |
|
| Microsoft Cloud App Security Microsoft365 Compliance |
|
| Microsoft Cloud App Security Microsoft365 Data Center |
|
| Microsoft Cloud App Security Microsoft365 Dynamics |
|
| Microsoft Cloud App Security Microsoft365 Exchange |
|
| Microsoft Cloud App Security Microsoft365 Flow |
|
| Microsoft Cloud App Security Microsoft365 Forms |
|
| Microsoft Cloud App Security Microsoft365 Insights |
Insights derived from data gathered by the MSCloud App Security service. |
| Microsoft Cloud App Security Microsoft365 Power BI |
|
| Microsoft Cloud App Security Microsoft365 Project |
|
| Microsoft Cloud App Security Microsoft365 Security |
|
| Microsoft Cloud App Security Microsoft365 Sharepoint |
|
| Microsoft Cloud App Security Microsoft365 Skype |
|
| Microsoft Cloud App Security Microsoft365 Video Stream |
|
| Microsoft Cloud App Security Microsoft365 Teams |
|
| Microsoft Cloud App Security Microsoft365 Workplace |
|
| Microsoft Cloud App Security Microsoft365 Yammer |
|
| Microsoft Defender for Identity |
Azure ATP |
Microsoft Defender for Identity events (formerly known as Azure Advanced Threat Protection (ATP) events) |
Sensor: Logger Module |
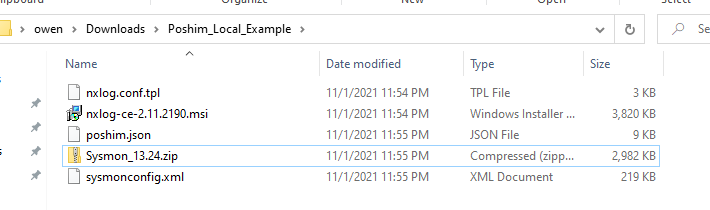
| Microsoft Windows |
Microsoft Windows |
MS Windows Logs |
Blumira Agent
or
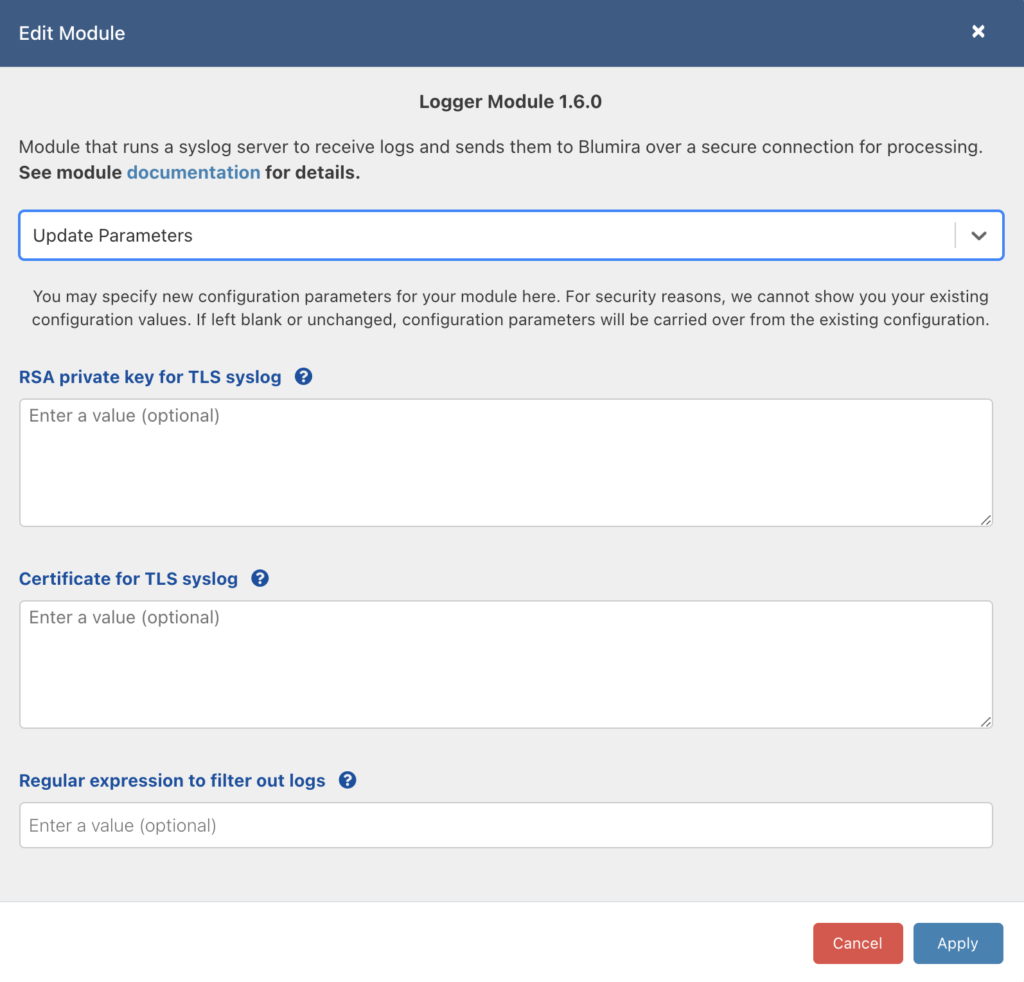
Sensor: Logger Module
|
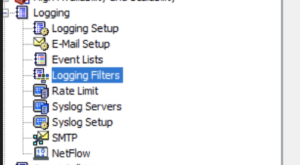
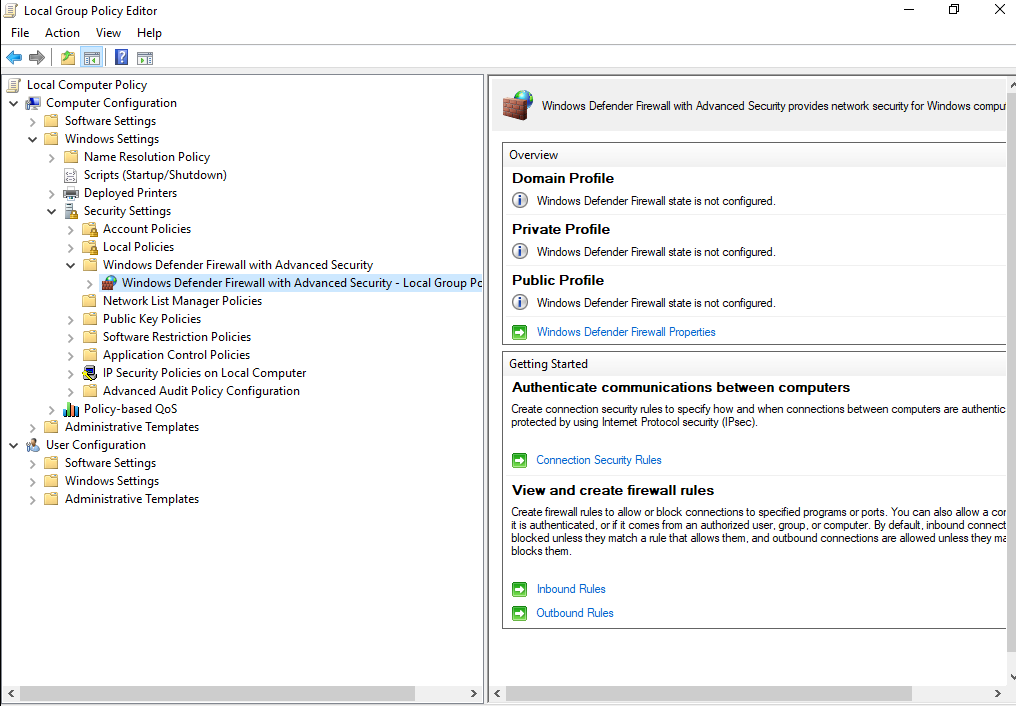
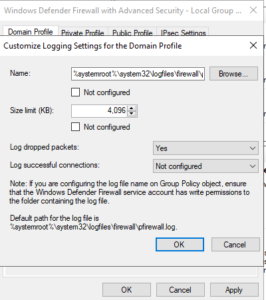
| Microsoft Windows Firewall |
Windows Firewall |
Microsoft Windows built-in firewall event logs. |
Sensor: Logger Module |
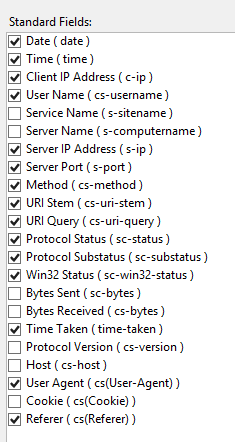
| Microsoft Windows Internet Information Services (IIS) |
IIS Configuration Events |
|
Sensor: Logger Module |
| HTTP Access (Apache/IIS/NginX) |
|
| HTTP Error (Apache/IIS/NginX) |
|
|
|
Mimecast Audit |
|
Cloud Connector: Mimecast
|
| Mimecast Rejection |
|
| Mimecast Release |
|
| Mimecast SIEM |
|
| Mimecast TTP Attachment |
|
| Mimecast TTP Impersonation |
|
| Mimecast TTP URL |
|
| Okta |
Okta |
|
Sensor: Okta API Module |
| OSQuery |
OSQuery |
|
Sensor: Logger Module |
|
|
Palo Alto Config |
|
Sensor: Logger Module
|
| Palo Alto Correlation |
|
| Palo Alto Cortex XDR |
|
| Palo Alto System |
Palo Alto Networks (PAN) device system log events (i.e., those generally related to the operation of the network device itself, not traffic or data plane activity) |
| Palo Alto Threat |
Palo Alto Networks (PAN) intrusion detection & prevention product logs |
| Palo Alto Traffic |
Palo Alto Networks (PAN) firewall traffic logs |
| Palo Alto Traps Agent |
|
| Palo Alto Traps ESM |
|
| Palo Alto UserID |
Requires Palo Alto Active Directory Integration |
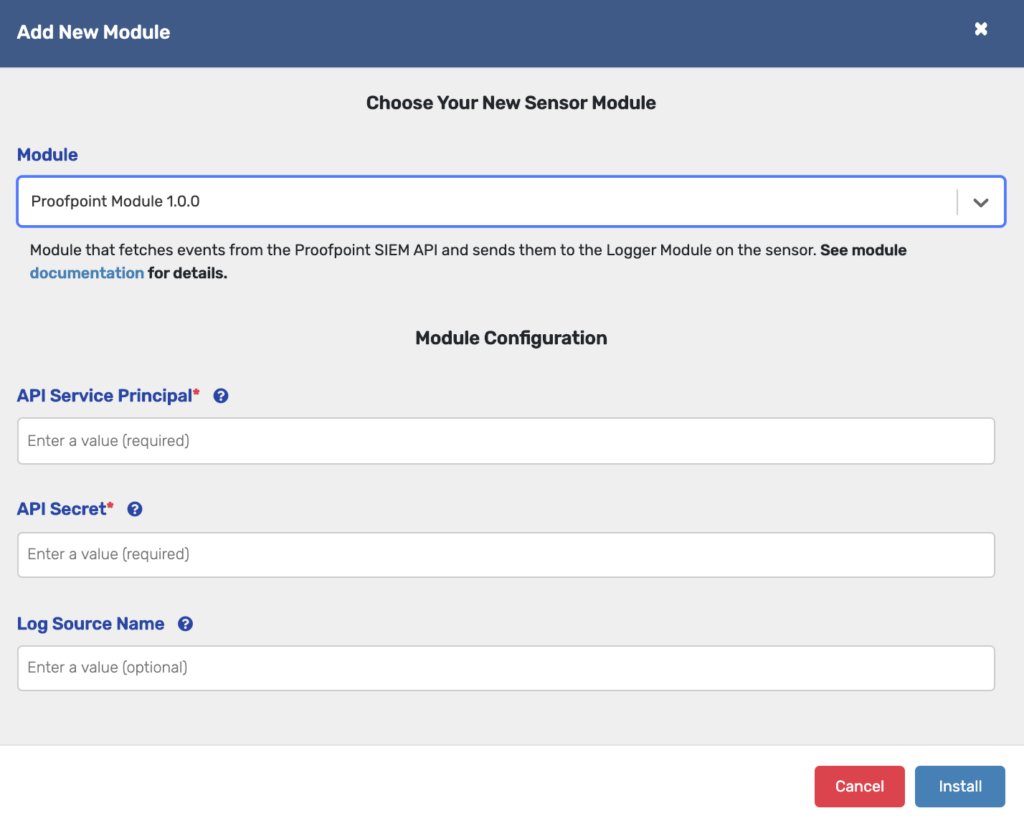
| Proofpoint |
Proofpoint |
|
Sensor: Proofpoint Module |
|
|
SentinelOne Activities |
|
Cloud Connector: SentinelOne
|
| SentinelOne Alerts |
|
| SentinelOne Threats |
|
| SentinelOne Token |
|
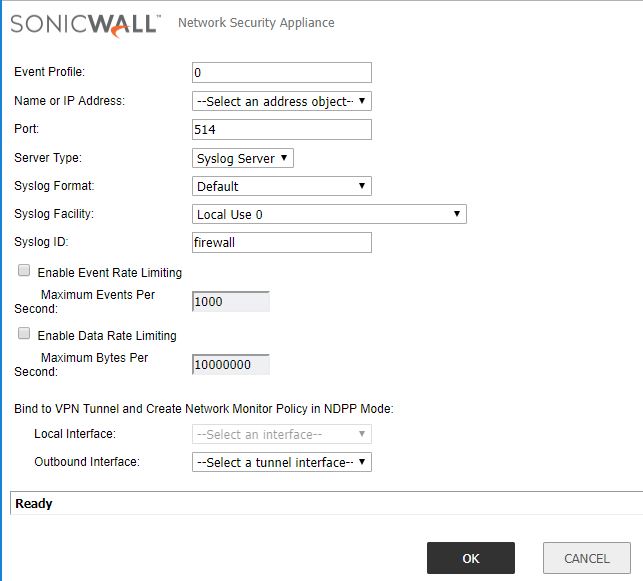
| SonicWall Next-Generation Firewall |
SonicWall |
|
Sensor: Logger Module |
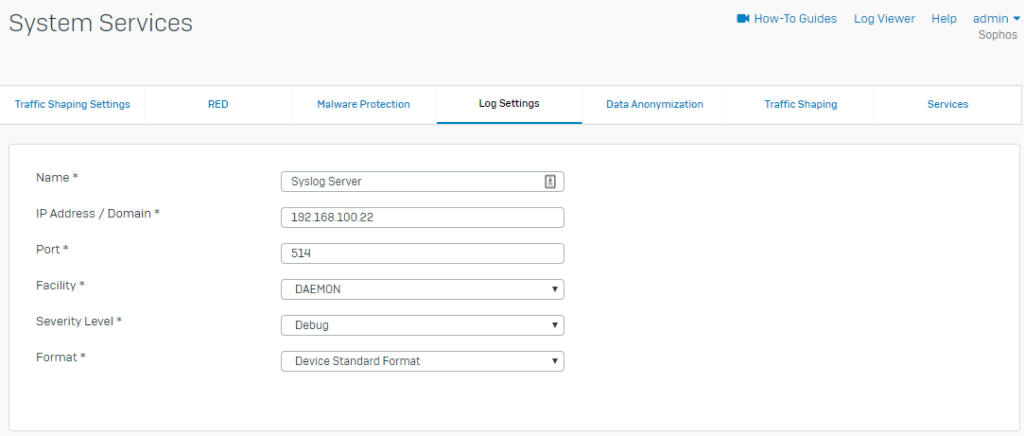
| Sophos Central |
Sophos Central |
|
Sensor: Sophos Module |
|
|
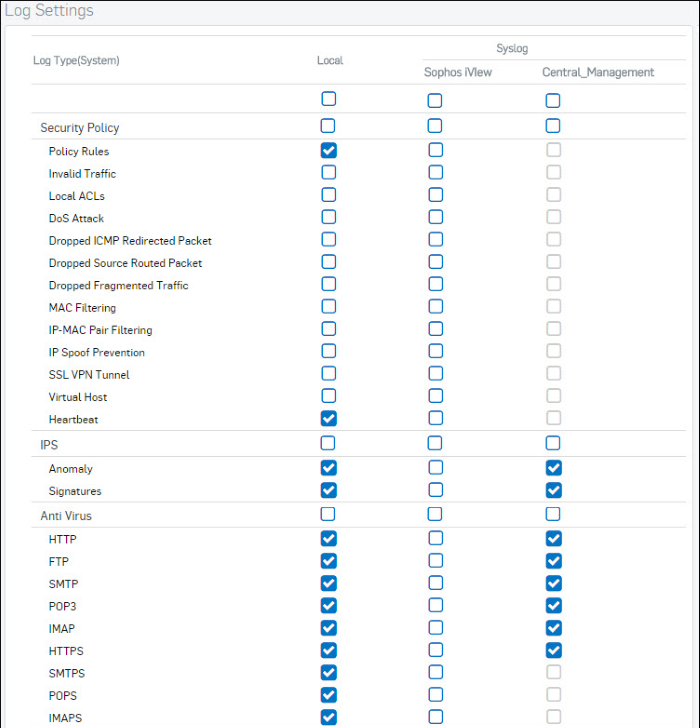
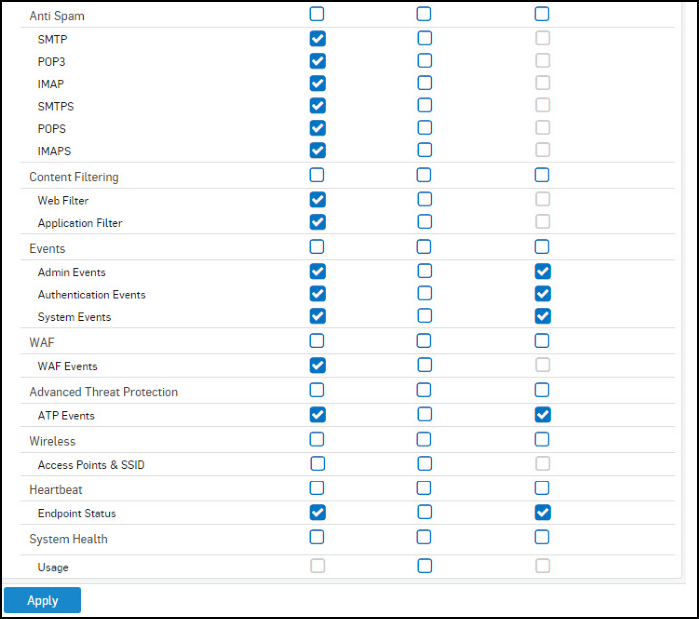
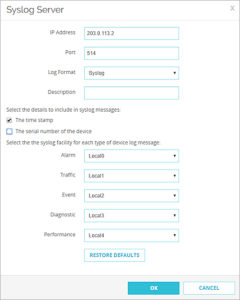
Sophos XG Anti Spam |
|
Sensor: Logger Module |
| Sophos XG AntiVirus |
|
| Sophos XG ATP |
|
| Sophos XG Content Filtering |
|
| Sophos XG Event |
|
| Sophos XG Firewall |
|
| Sophos XG Heartbeat |
|
| Sophos XG IDP |
|
| Sophos XG System |
|
| Sophos XG Traffic |
|
| Sophos XG Wireless |
|
| Symantec Endpoint Security |
Symantec |
|
Sensor: Logger Module |
|
|
Trend Micro Apex One Server |
|
Sensor: Logger Module |
| Apex Central (CEF) |
Apex Central AV logs in CEF format |
| Trend Micro Deep Security Agent |
|
| Trend Micro Deep Security Manager |
|
| Trend Micro OfficeScan |
|
| Unix/Linux |
Unix/Linux |
Linux, Unix, and related systems that produce syslog-format Logs. |
Sensor: Logger Module |
| VMware Carbon Black Cloud Endpoint Standard |
Carbon Black Defense |
VMWare Endpoint Standard (formerly CB Defense) logs. |
Sensor: Carbon Black Defense Module |
| VMware Carbon Black App Control |
Carbon Black Protection (App Control) |
VMware Carbon Black App Control (formerly CB Protection) |
Sensor: Logger Module |
| VMware Carbon Black EDR |
Carbon Black Response |
VMware Carbon Black EDR (formerly CB Response) event logs |
Sensor: Carbon Black Response Module |
| Carbon Black Threathunter |
VMware CB Enterprise EDR (formerly Carbon Black Threathunter) |
|
|
VMWare |
VMWare ESXi, VSphere, and related platforms that generate Syslog |
Sensor: Logger Module |
| VMware AppDefense |
|
| VMWare DHCP |
DHCP event logs derived from VMWare ESXi, VSphere, and similar solutions |
| VMware Edge |
|
| VMware ESXi |
|
| VMware vCenter |
|
| VMware vSAN |
|
| WatchGuard Firebox Firewall |
Watchguard |
Watchguard Firewall such as the Firebox Platform |
Sensor: Logger Module |
| Webroot |
Webroot Blocked Traffic |
Traffic that Webroot blocked |
Cloud Connector: Webroot |
| Webroot Threats |
|
| Webroot URL Logs |
General Webroot logs |
| Cerberus |
Cerberus |
Cerberus FTP Server authentication and activity logs. |
Sensor: Logger Module |
| Junos System |
Junos System |
System diagnostics, error, and informational messages pertaining to operation (control plane) of the Junos device itself, rather than traffic. |
Sensor: Logger Module |
| Junos Traffic |
Junos Traffic |
|
Sensor: Logger Module |
| Junos Web Filter |
Junos Web Filter |
|
Sensor: Logger Module |
| Kaspersky |
Kaspersky |
|
Sensor: Logger Module |
| OSSEC |
OSSEC |
|
Sensor: Logger Module |
| Thycotic |
Thycotic Secret Server |
Password manager for on-prem secret storage and sharing. |
Sensor: Logger Module |
| Any |
Unparsed - Error |
Data that was unparsed due to an error. |
Any |
| Any |
Unparsed - Time Handling |
Data that was unparsed due to oddity in time conversions. |
Any |
| Any |
Unparsed Logs |
Logs either pending parsing or with no planned parsing, Blumira recommends using Regex to filter these down. |
Any |
.
.


 .
.